nutrition

Juicing Cured My Gastroparesis

20638033_10155714648168969_1875038255045257333_n.jpg

Juicing Cured My Gastroparesis

A lot of people ask me the same question “Why did you start juicing?” and I never thought so many would, because I figured they would just chalk it up to me wanting to be “trendy”.

This is not the case, though, and I find it pretty cool that people are so interested in my story. So, I am going to lay it all out there. Maybe it will help you find some peace in something you’re dealing with. Maybe it will give you hope for your health. Or maybe it will just be a little extra layer of info about me. Whatever it may be, here it is.

I Wasn’t Eating

You read that correctly. Let’s take it back to 2014. As each month passed, I stopped being able to eat more and more. I would always sit down to try, and sometimes I would force myself and then end up being really sick afterwards. It was not a good direction I was heading, nor was it a good lifestyle to be living. I could literally eat a piece of apple and be full for 2 days. That is not normal and that is not healthy.

I was running out of hope and ideas on why I was feeling this way. I tried everything, cutting out lactose, cutting out gluten, cutting out even certain fruits and vegetables. Nothing was working. Every trendy diet you can think of out there, I tried, and it failed me. Finally, I decided it was time to go to the doctor.

No One Knows

From October 2014 until May of 2015 I endured test after test, pill after pill and plenty of heartache. Doctors couldn’t figure out what was wrong with me. By all standards, I was a perfectly healthy 22-23 year old with a tummy ache.

We did tests for colitis, Crohn’s, IBS, IBDS, cancer checks and many more. Finally, my mom and I sat on her bed one night scouring the internet for any possible answer, and that’s when it came to us. We clicked on the link for something called, Gastroparesis. Sounds scary, but more than that, it was confusing. The only thing we could find, at first, was that it was for diabetics. I am not diabetic.

With more digging, we found that you can get Idiopathic Gastroparesis. This simply means they don’t know why it happens or what caused it. AWESOME. Gastroparesis technically means “paralyzed stomach”, but it has everything to do with your stomach not emptying the food in an appropriate amount of time and not being able to digest and then all the repercussions that follow that. EVEN MORE AWESOME…

The next appointment I had with the doctor, I mentioned the possibility of Gastroparesis and they looked at me and said, ”It’s highly unlikely, but if you really want to do the test for it, we can order it for you”. I am glad I asked. I went in for the 4 hour test and after 2 hours, the nurse told me “Oh honey, you don’t even need to stay for the next 2 hours. It’s plain as day that you have this.”

The test is comprised of you eating a completely balanced meal. So, 1 egg white and two pieces of toast with jelly and some water. You then lay down and literally just lay there. A machine monitors the emptying of your stomach. After 2 hours, you are supposed to have emptied 50% or more of your food. After just 2 hours of me laying there, I had emptied 32%. Now, this might not seem like a big deal, but it would take a normal person 4 hours to empty their stomach and digest, it would take me anywhere from 6-9 hours, depending on the meal. That can be painful, trust me. Food sitting there for hours, stomach acid building, and so many more things happening.

The Next Steps

Ok, so we figured it out. Now what? How do you cure a disease that you don’t even know how or why it happens? You take a guess and try every pill under the sun!

My doctors gave me EVERY pill they knew of that MIGHT help. The reactions were detrimental. One gave me anxiety so bad I couldn’t handle myself. I’ve never had it, and I can tell you that I never want to again. The next cramped my body up so bad I couldn’t walk. The final pill changed my moods so drastically that I was a nightmare to be around. I didn’t even want to be around myself. I knew taking medicine my whole life was not something I was wanting to do my whole life, either.

That was it. Those were all of my options. BUT WAIT, there was one more. The doctors said I could get a pacemaker put into my stomach. 23 years old and you want to do major surgery on me that might not even work? No thank you. I don’t want to have to return every 10 or so years for major surgery.

“Where do I go from here? Am I just doomed to feel like this for the rest of my life? I can’t even hold a normal job, because I am so sick. How will I be self-sustainable?” These were the daunting thoughts that ran through my head most days. This is not a good life for someone so young and just starting out.

Family To The Rescue

After expressing all of my pain and struggle to my older brother, he mentioned I should try juicing. At the time, he lived in Austin, so I just thought he was being a “trendy, hippy Austinite”. So, I wrote it off for a while. He then sent me 2 recipes to try.

The first one I ever sold, The Beginner, was a version of the juice he told me to try. It changed my life. I was feeling so much better, because my body was getting these nutrients I needed, but not putting the stress on it to digest solid food. I was able to “eat” without eating, without feeling sick, without all of the pain. This was my first step to getting my life back.

I decided to commit to juicing every day for at least breakfast and I did it for about 6 months and then tried a 3-day cleanse. Everything in my body was changing, for the better. I was feeling healthier, stronger, happier, full but not sick. BUT, my stomach wasn’t quite there. When I wasn’t juicing, I was trying to eat normal food, but my body still wasn’t having it.

The Final Step

Juicing had helped me out tremendously, but I still had what felt like a baseball once I ate real food. My mom and I started searching again! We found acupuncture. Wow. Just wow. I drank a juice and headed off to my first appointment, nervous and very reluctant. This was my missing piece.

I went to Marr Physical Medicine in League City. Dr. Marr is a Chiropractor that studied acupuncture. He was kind, and listened to all my complaints and knew exactly where to put the needles to help me out. After that first appointment, I finally felt like my old self again. I went back for 6 more sessions and then I continue to go about every 4 months. When I explain it to people, I equate it to jumping your car’s battery.

My nerves weren’t firing to my stomach, but as soon as he put those needles in and a heat lamp over them, it was like my whole body got a fresh charge. It was the most incredible feeling. I walked out of that first appointment with a smile and then about an hour later, I felt hungry for the FIRST TIME IN A YEAR AND A HALF. I almost confused it with being sick again, because I had forgotten what that felt like.

Here Comes Real Peel

Fast forward to 2016 and, I have done it. I have “cured” myself back to about 85% and I couldn’t have done it without juice and acupuncture. Once I realized the magnitude of what I had done, I knew I HAD to use this knowledge to help others. My thought was “If juicing could almost cure my incurable condition, then what could it do for the person with indigestion? Or the person with chronic migraines? But more than that, I thought, with all of this knowledge of juicing and nutritional therapy, how can I help others with Gastroparesis?”

Enter Real Peel.  I got certified as a Nutritional Therapy Practitioner and did research on what each fruits and vegetables did for your body and I created juices around those. For those with Gastroparesis & other digestive issues, I always suggest The Guardian. Even something as simple as low energy, there is The Sparkler.

The possibilities are endless with nutrition and if you ever thought that Real Peel was created just to be a part of a trend, then you are mistaken!

Then, I knew juice wasn’t the only way, so I wrote down all of the things I tried to help with my Gastroparesis and created programs to help others. Just in a faster way than I figured it out.

It is now 2023, and I have spent years feeling great! For an update, click here.

But aside from my own health, I have helped countless women and men suffering with Gastroparesis with my One-On-One services. Want to learn more about Gastroparesis and how I have helped myself and many others get their Gastroparesis under control?

Follow these few quick steps:

  1. Have you downloaded our FREE 3-Day Gastroparesis Guide? If not, click here to download.

  2. Then, click here to head to our Gastroparesis page. There is so much information on there to go over and learn.

  3. If you are interested in Juicing for Gastroparesis, we have an Ebook containing recipes for Gastroparesis for all severity levels. You can find that ebook here.

I am here to help you heal, to enhance your health, and to make your quality of life so much better! I want you to THRIVE, not just barely survive.

But, that’s just me. That’s my story of how juicing (and some other protocols) healed my Gastroparesis.

That’s also my why. That’s why I get up every day and help clients, write blogs, put out as much information as I can. To continue to make juices and provide you with nutrition information.

I don’t want anyone else to feel how I felt. I want to change the way you feel.

Until next time,

Aubrey.

Keep it Fresh. Keep it Simple. Keep it Real.

Foods to Boost Your Immune System

Our previous blog post focused on How to Boost Your Immune System, but you now know that one of those tips is a nutrient-dense, healthy diet. So, you might be asking, what kind are the foods to boost your immune system?

Here are 10 foods that are great for your immune system, year-round:

  1. Citrus: I feel like this is the most obvious, but it’s a MUCH better option than a vitamin-C supplement. Include Oranges, Lemons, Limes and Grapefruits as a regular part of your diet.

  2. Red Bell Peppers: Most might believe that oranges have the most vitamin-C, but they would be wrong. Red bell’s have more than double the amount of vitamin-C than an orange!

  3. Ginger: an inflammation killer. Inflammation is a major immune response, and ginger can help reduce the inflammation in the body, which helps reduce the stress on the body and the immune system.

  4. Turmeric: very similar to ginger, turmeric is a major player in the inflammatory process.

  5. Green Tea: green tea is packed with flavonoids, a type of antioxidant that helps enhance the immune function

  6. Yogurt: we talked about how keeping up the microbiome is an important part of the immune system, and one way you can do that is with yogurt. You need live cultures, like in Greek yogurt in order for it to work the way it should

  7. Spinach: yes, it’s also packed with vitamin C, but it’s also packed with lots of antioxidants with infection-fighting ability. It’s at its best when it’s not cooked. All the nutrients are in tact.

  8. Garlic: garlic is packed with antibacterial, antiviral and anti-fungal properties. They are rich in antioxidants that help eliminate free radicals in the body.

  9. Broccoli: 1 cup of broccoli provides the same amount of vitamin C as an orange. It also contains a few of the needed B vitamins and some other needed minerals that support the immune system functioning.

  10. Sweet Potatoes: they contain a TON of vitamin A and about 30% of the daily recommended vitamin C needed. Plus, they have a good amount of fiber. It’s like you’re getting a 3 for 1 deal.

  11. Bonus: Pomegranate: I just love this fruit, so it’s my bonus tip. Pomegranates have beneficial compounds that inhibit the growth of bacteria.

Hopefully, this helps give you ideas on the foods you should be regularly incorporating into your diet in whatever way you can.

Some of these can be combined within one meal, making it super easy to have a variety in your diet.

If you are needing help on what exactly you should be eating for your Gastroparesis, make sure you download the Free 3-day Gastroparesis Healing Guide.

Until next time,

Keep it Fresh. Keep it Simple. Keep it Real.

Love, Aubrey

Sourdough Starter & Bread Recipe

IMG_6865.jpg

You know what I hate? When a blogger writes a recipe and they tell you their life story and you are just like GIVE ME THE DANG RECIPE!!! So, I will refrain from doing that and get to it!

Recently, on the Real Peel Instagram, I showed myself making a sourdough starter and then the sourdough bread and I had a major influx of requests for the recipe. So, without further ado…

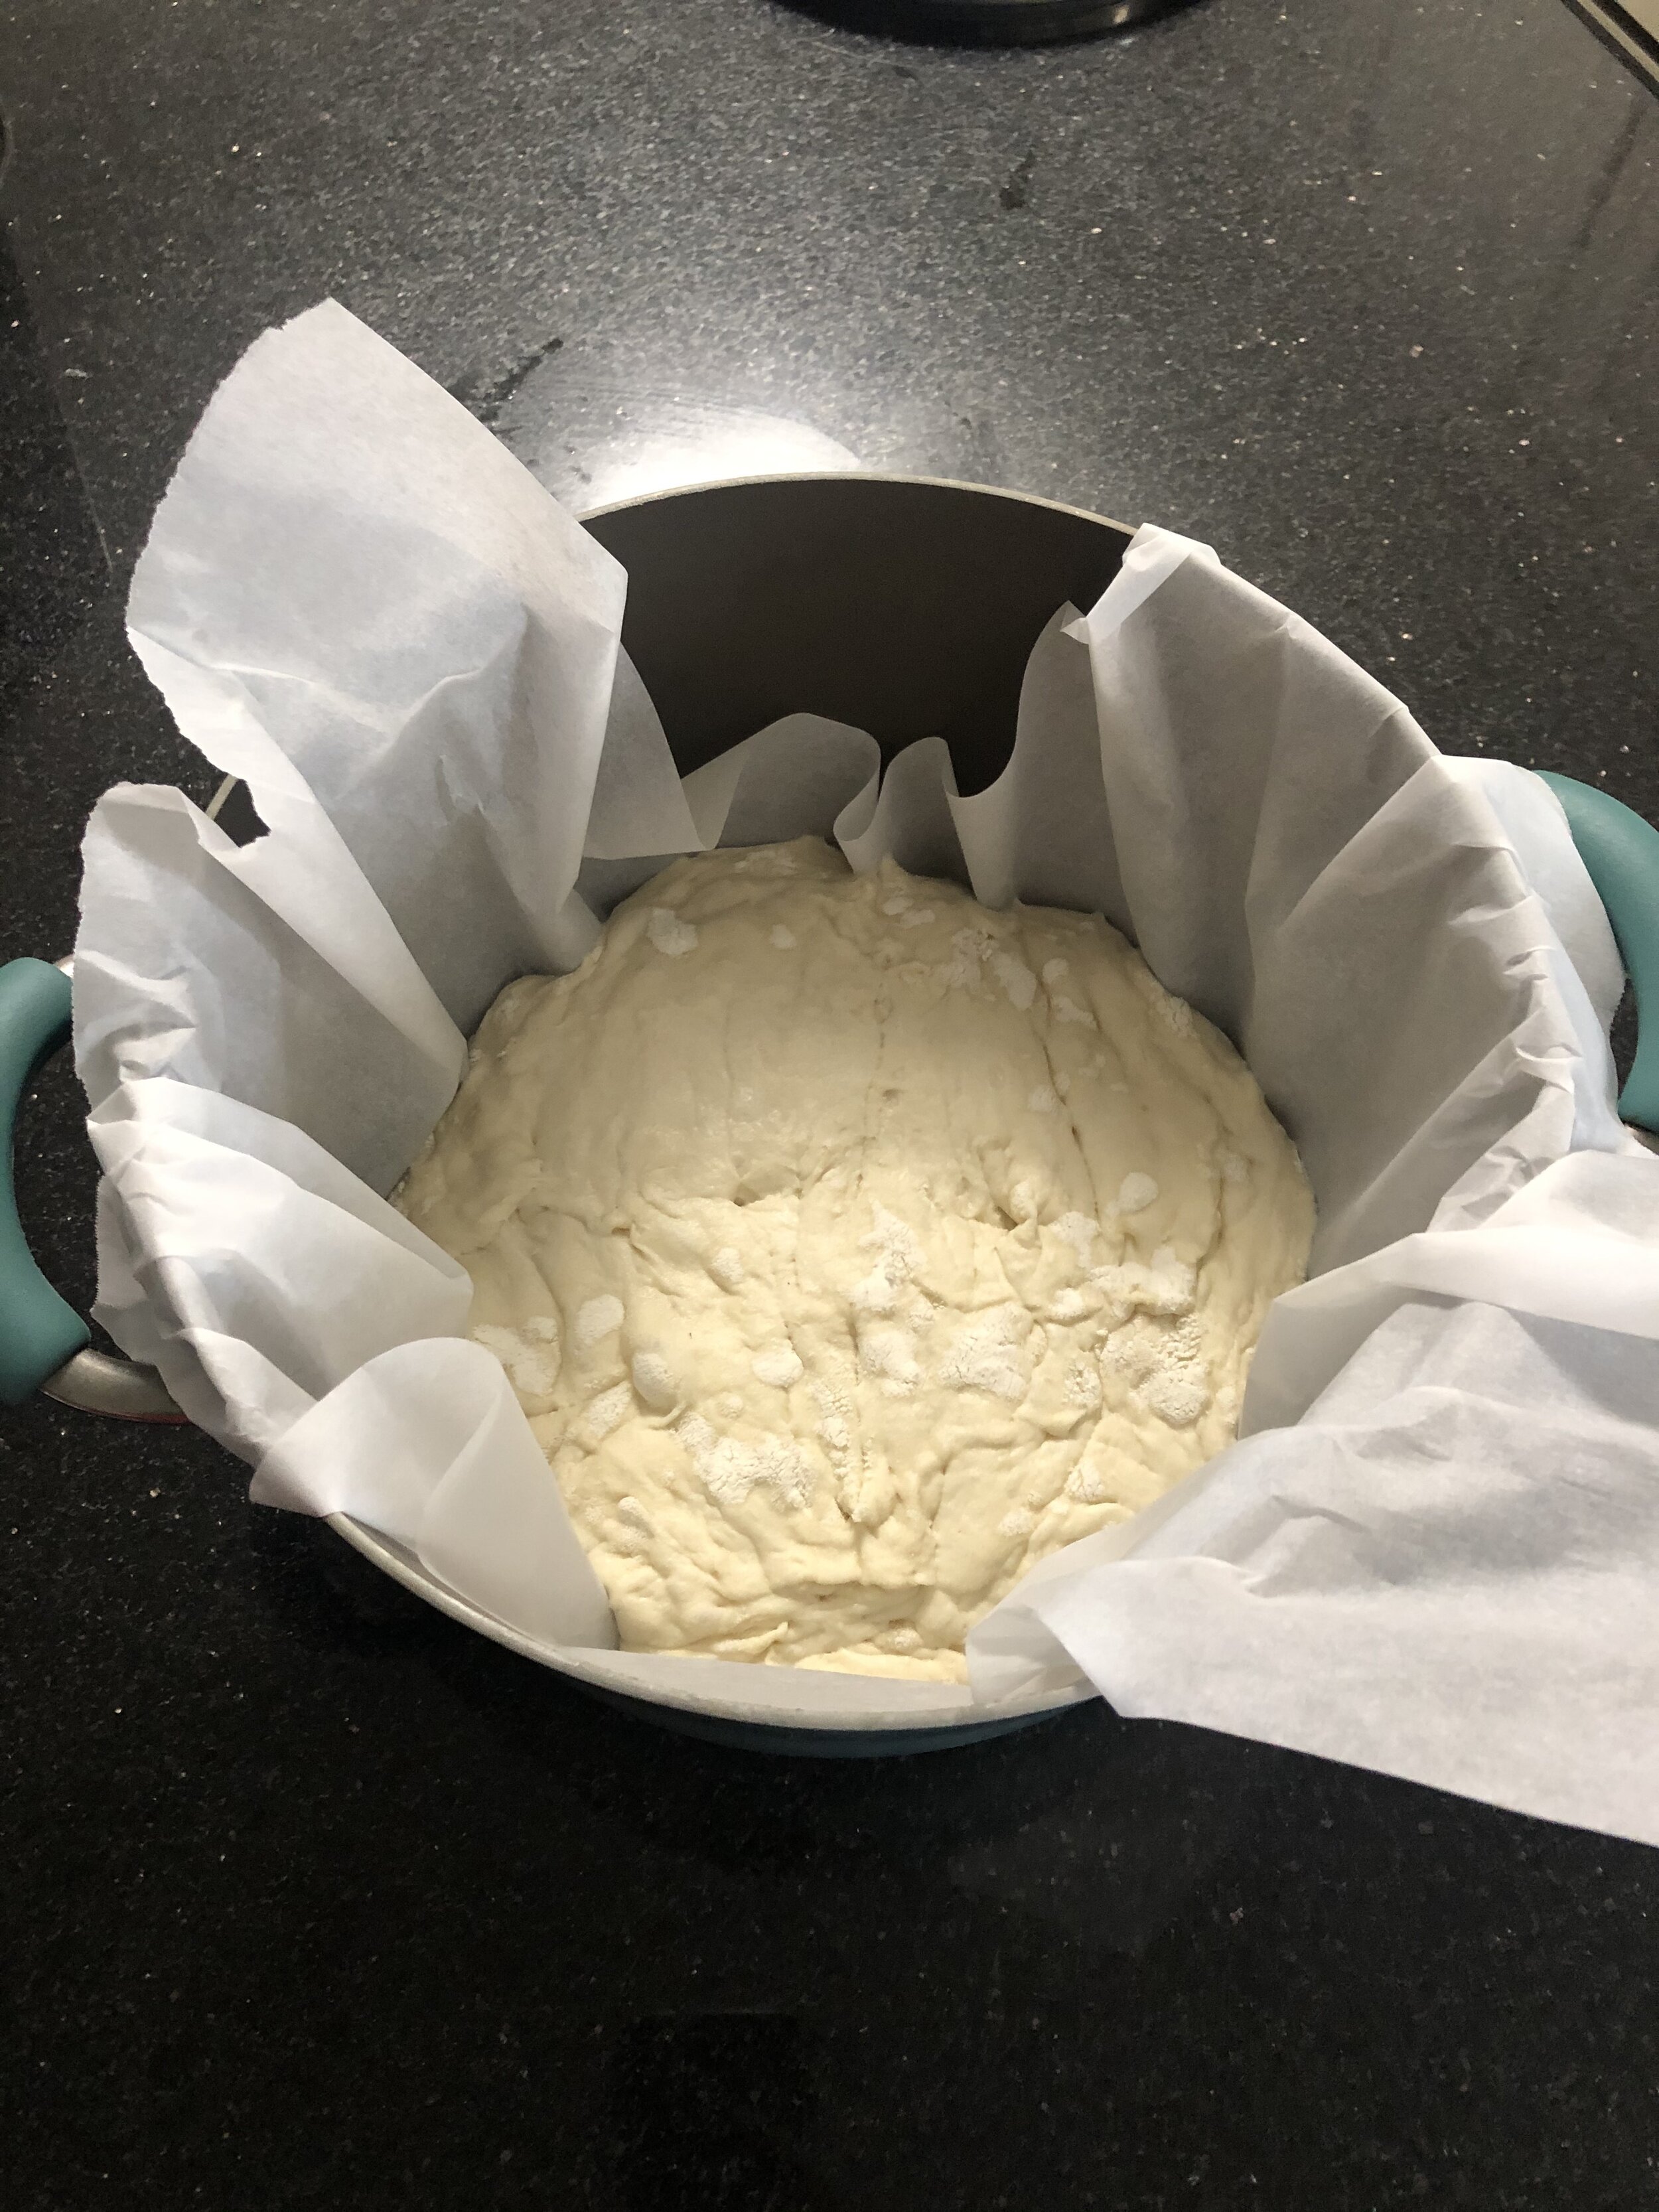
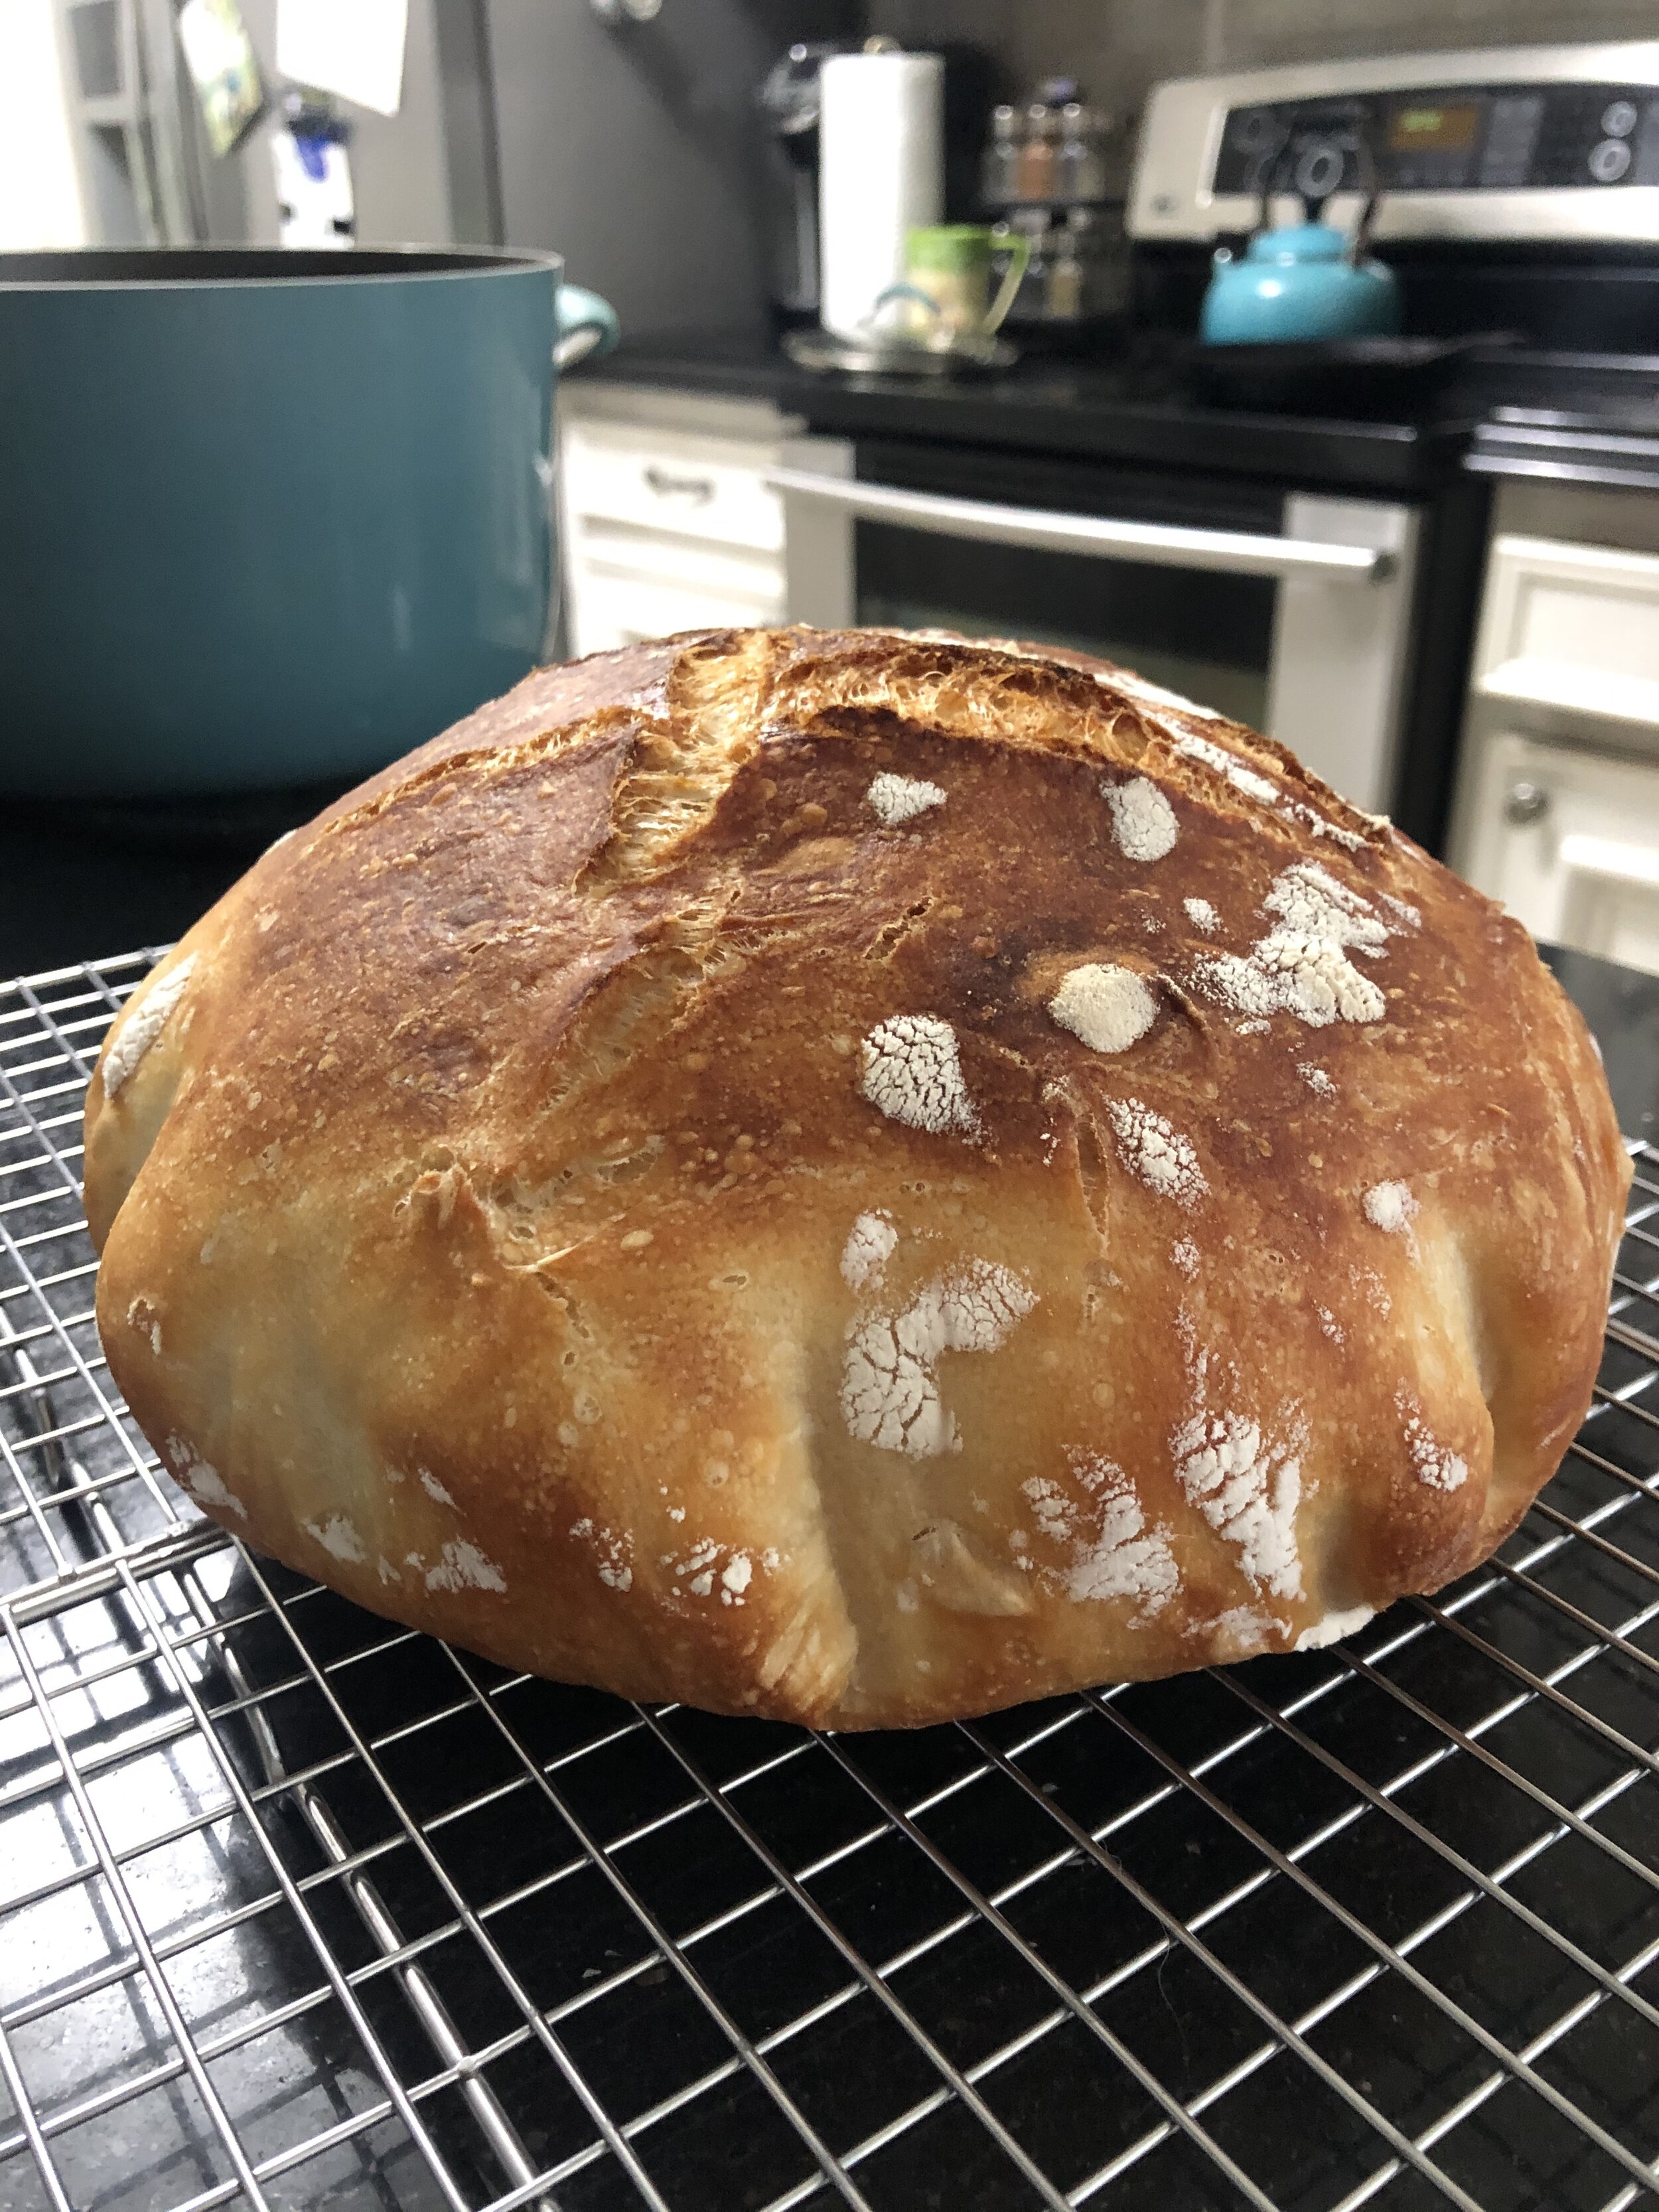
disclaimer: I am not a pro photographer or care to be, but I took the pics so you guys can see if you are on the right track while baking.

IMG_6856.jpg

Making Your Starter

note the bubbles

  • 2 cups warm water (not hot or boiling)

  • 1 teaspoon active dry yeast

  • 2 cups all-purpose flour (I don’t know how it would work with gluten-free, but if you try it, let me know)

In a bowl, add the warm water and yeast. Mix until the yeast is dissolved. Once dissolved, mix in the flour and stir until smooth.

Pour the starter into a plastic container that is big enough to allow for expansion. I, personally, used a plastic pitcher. Place a cloth napkin over the container and hold it in place with a rubber band.

Set the starter in a spot that doesn’t get too cold or too warm, doesn’t have a lot of draft and not a ton of sunlight for 5 days. Stir the starter once a day.

After the 5 days, it is ready to be used or put into the fridge for storing. If you keep it in the fridge, you only have to feed it 1 time per week with equal amounts of flour and water.

Making the Sourdough Bread

this recipe is adapted from Cultured Food Life

You will need:

  • 1/4 cup of your starter

  • 1 1/3 cups plus 2 tbsp of warm water (again not boiling, just warm)

  • 4 cups plus 2 tablespoons of all-purpose flour (I personally haven’t tried other flours)

  • 1 1/2 teaspoons of sea salt

  • a Dutch Oven

  • Parchment paper

  • Whisk

  • Spatula

Tip: it’s so much easier to gather all ingredients before you start mixing.

  1. Add the starter and warm water to a ceramic bowl. Whisk until well combined

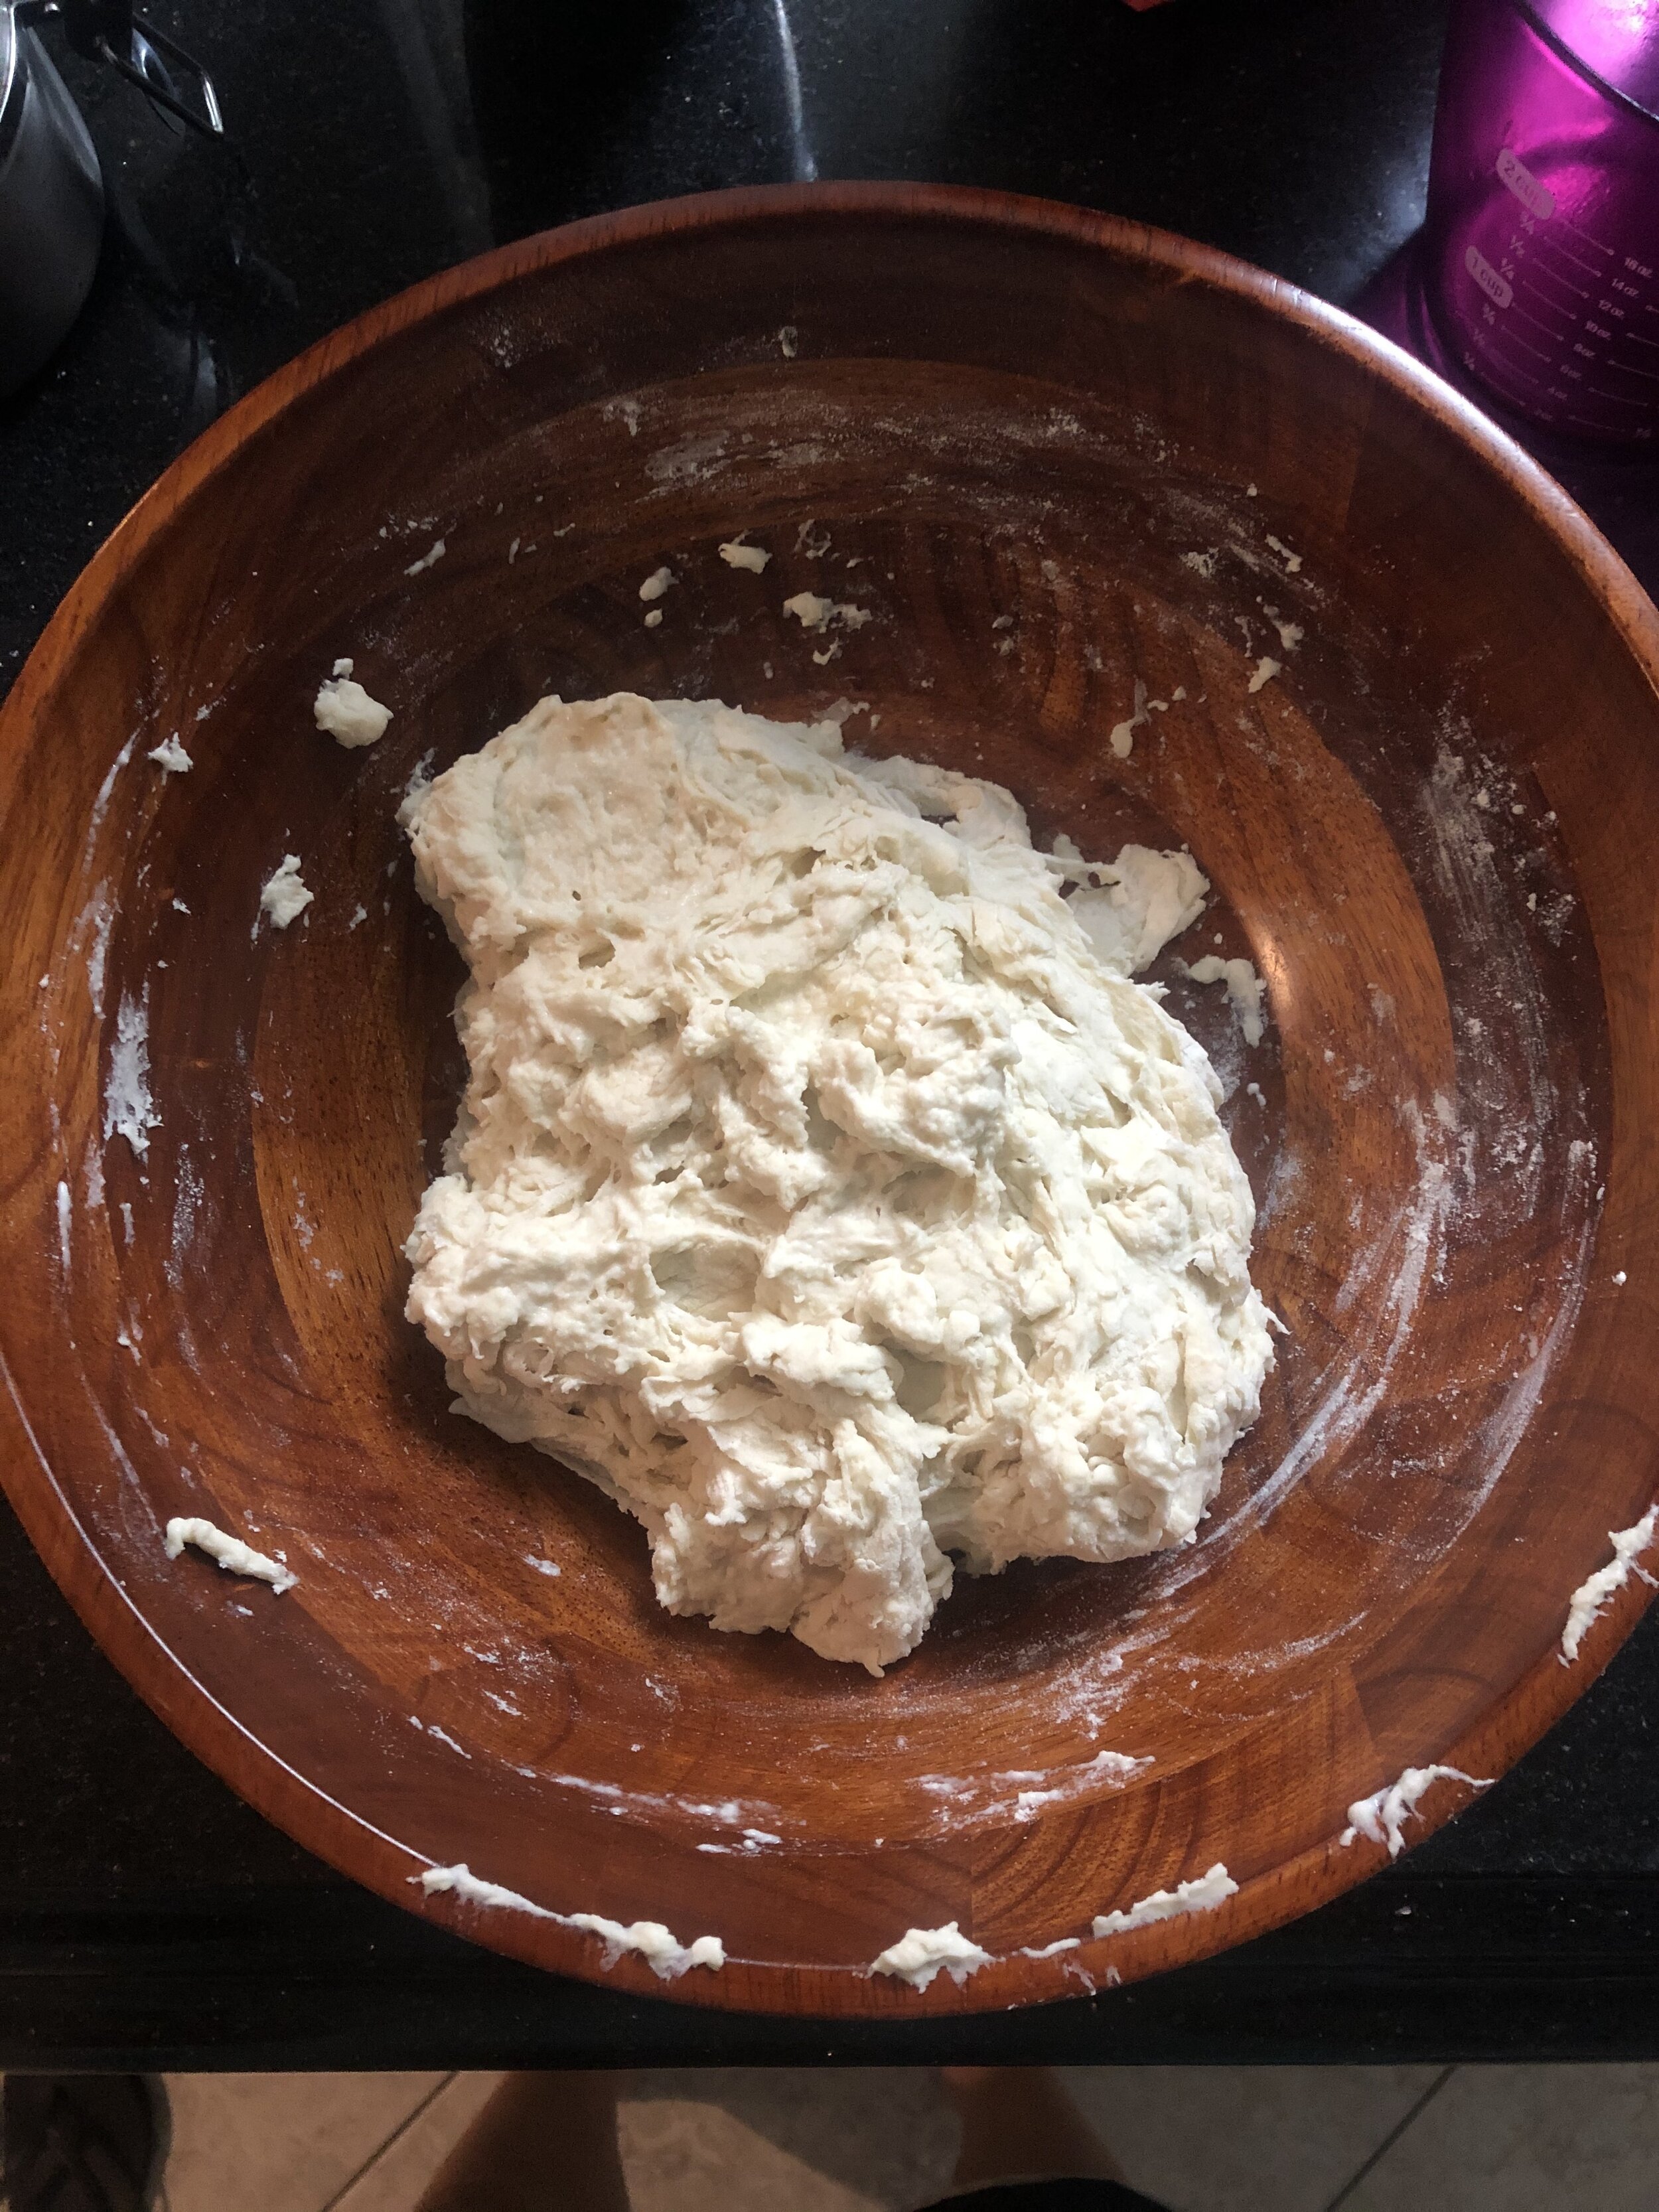
  2. Add the flour and salt and combine together with a stiff spatula until fully incorporated. If you want to use your hands, go for it, but it’s not required. The dough will look scrappy, dense and sticky.

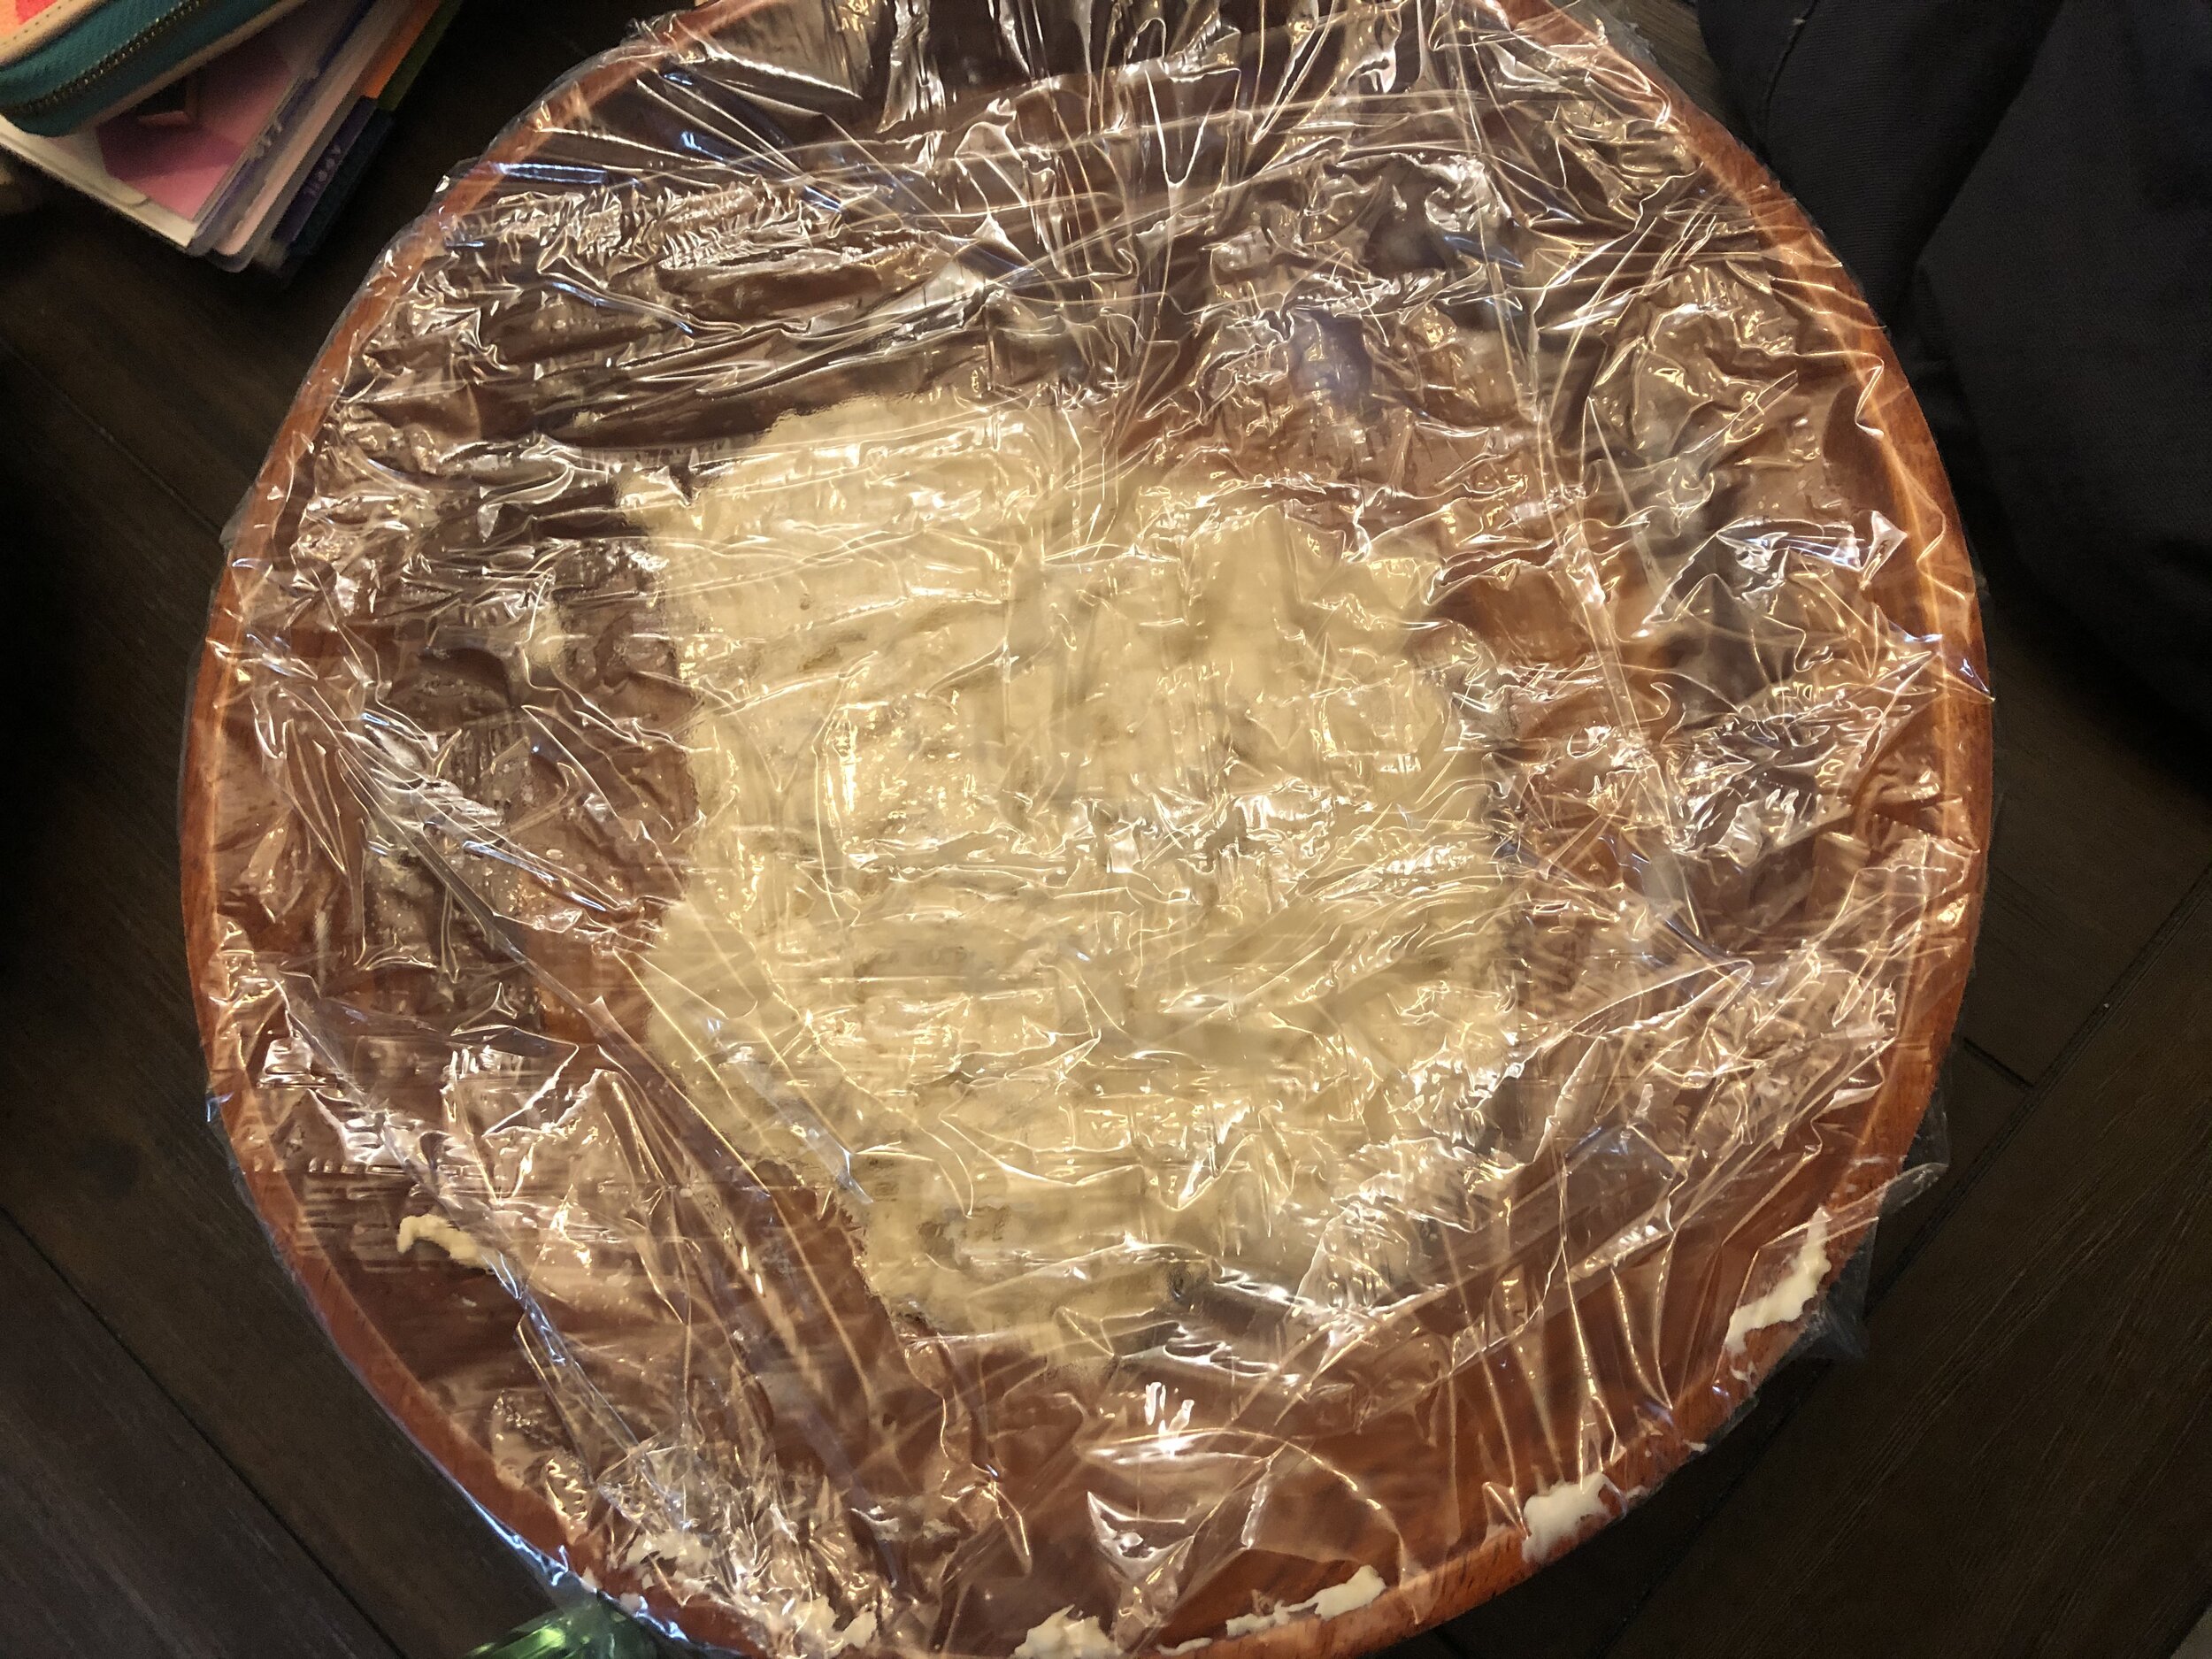
  3. Cover the bowl with plastic wrap and let sit for 30 minutes.

  4. After the 30 minutes, flour your hands and work the dough into a smoother ball. You can achieve this by folding the dough towards the center until it smooths out.

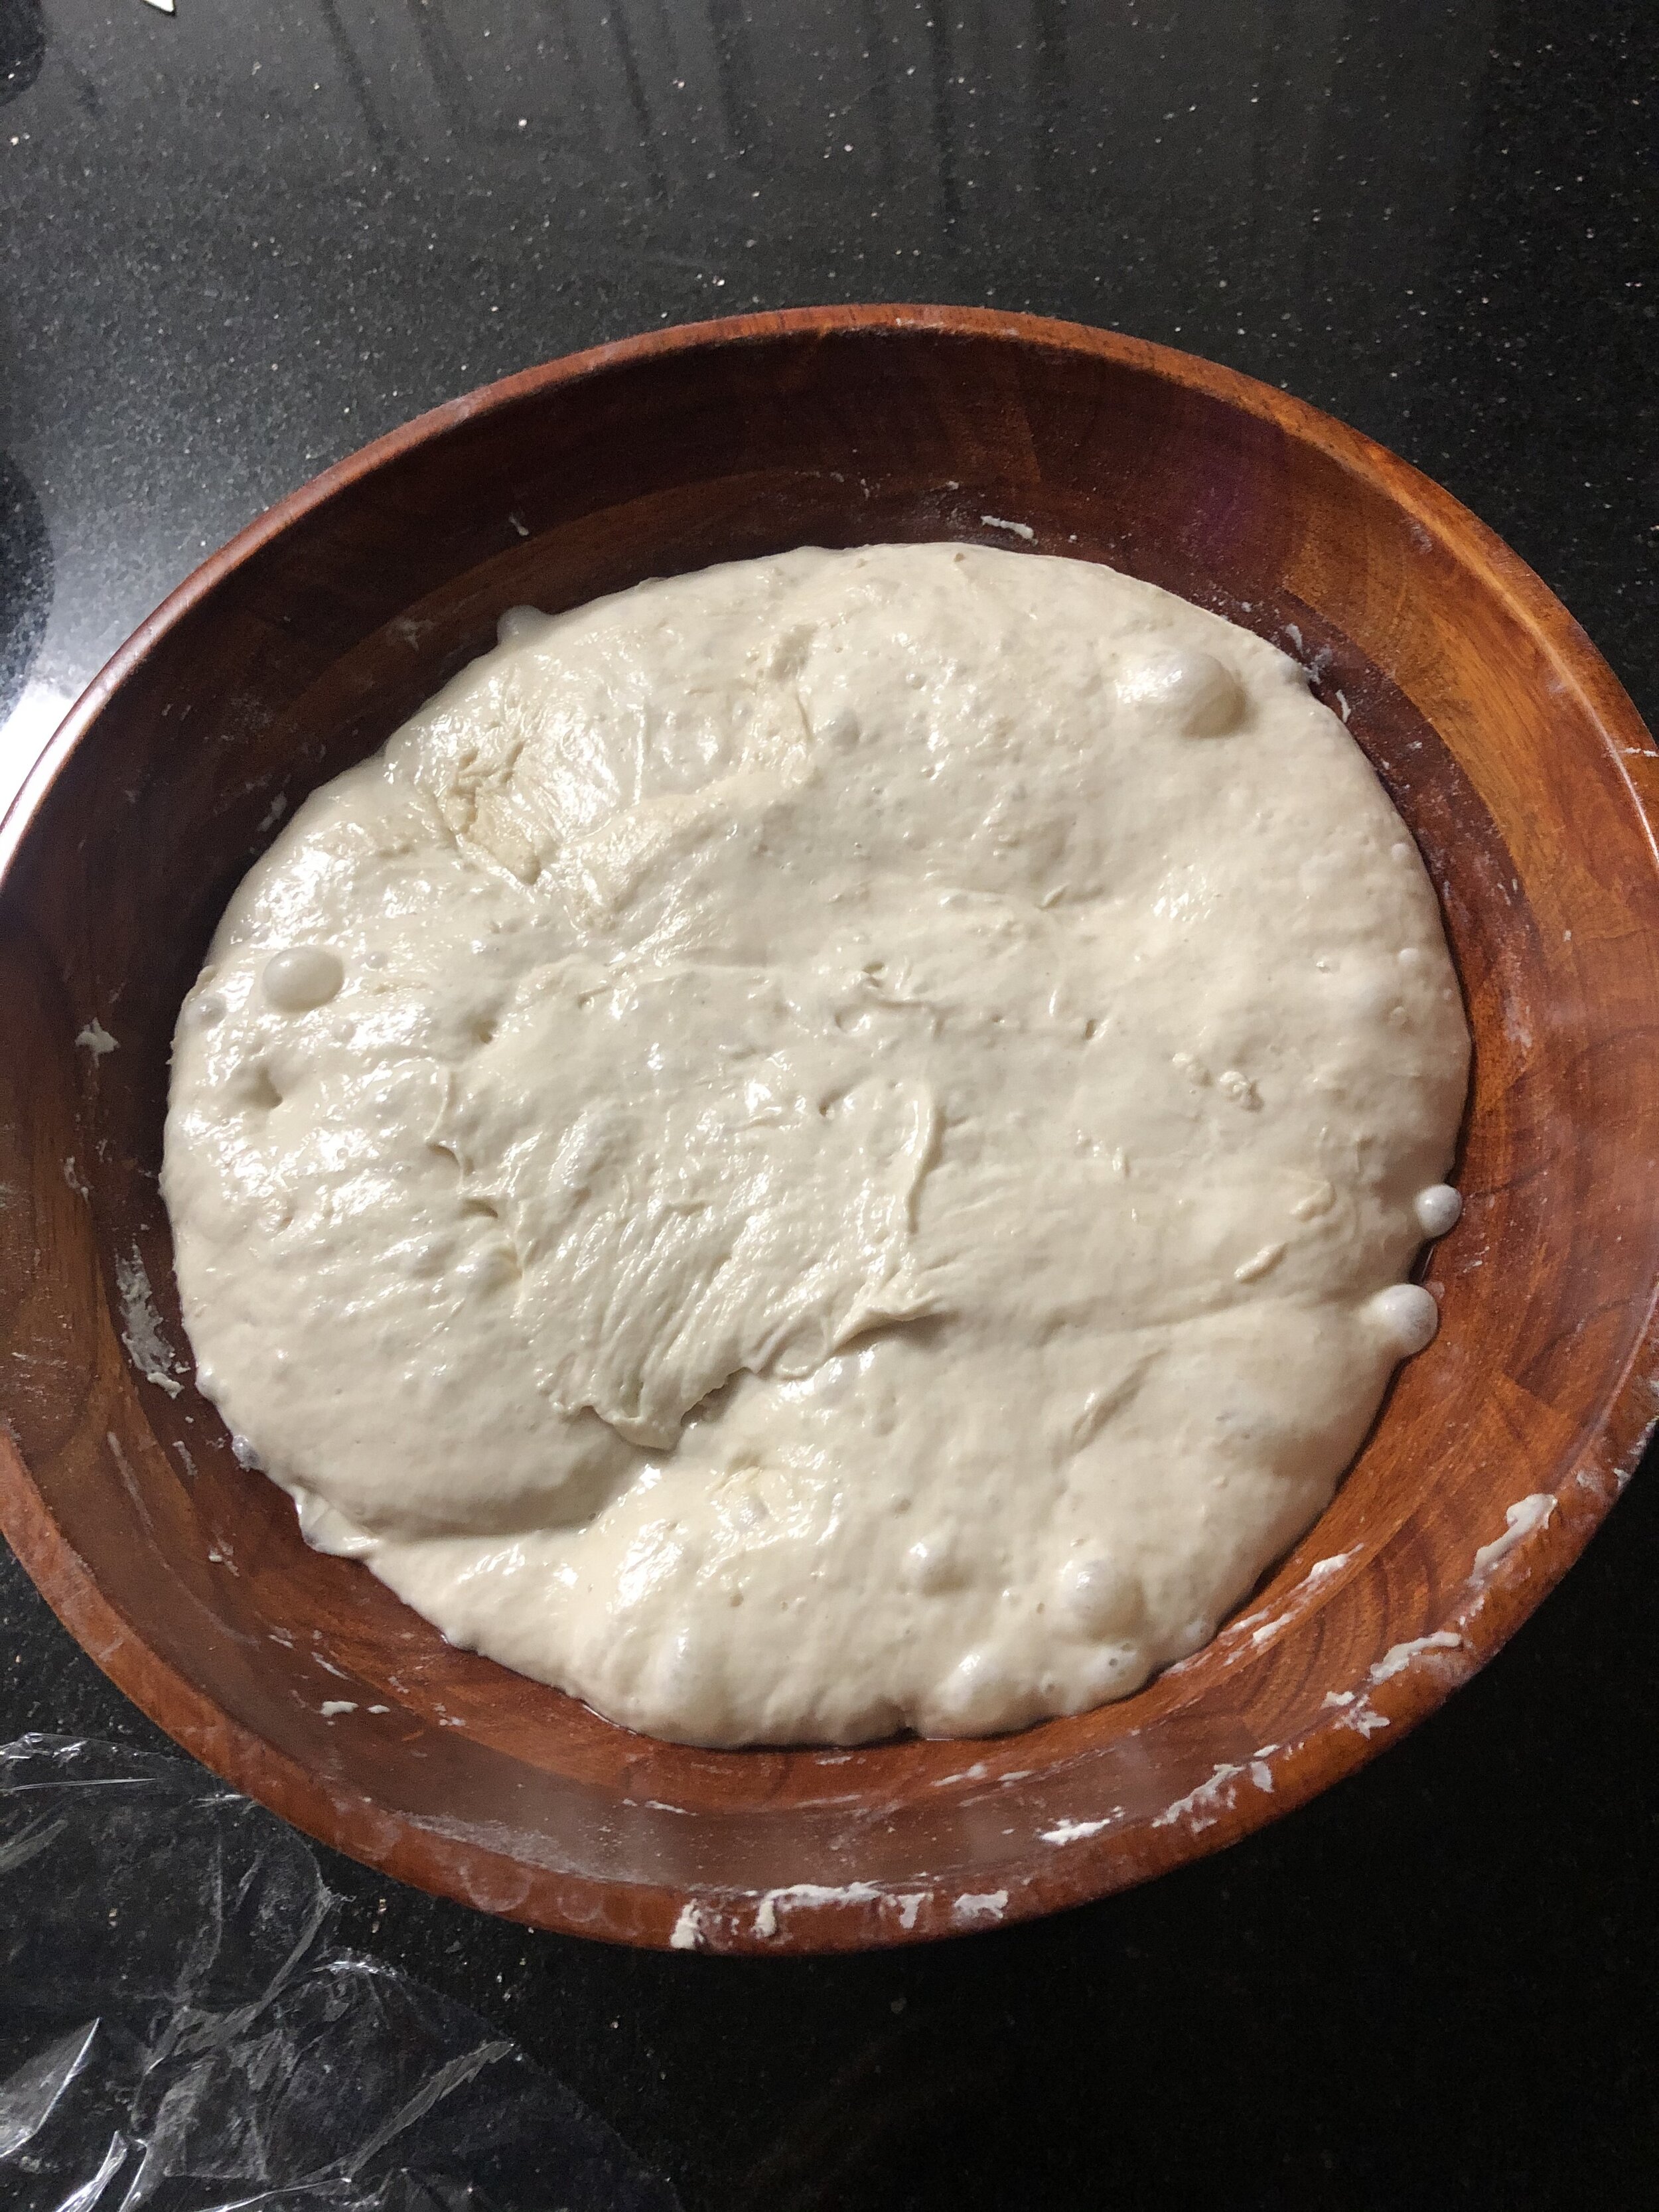
  5. Place the dough back in the bowl and let rise 10 hours. You can also do this overnight. It should rise and look a lot puffier.

  6. Use the spatula to gently pull the dough off the sides of the bowl and turn out onto a floured surface. Flour your hands and begin folding the dough over again on each side.

  7. Let rest for 10 minutes

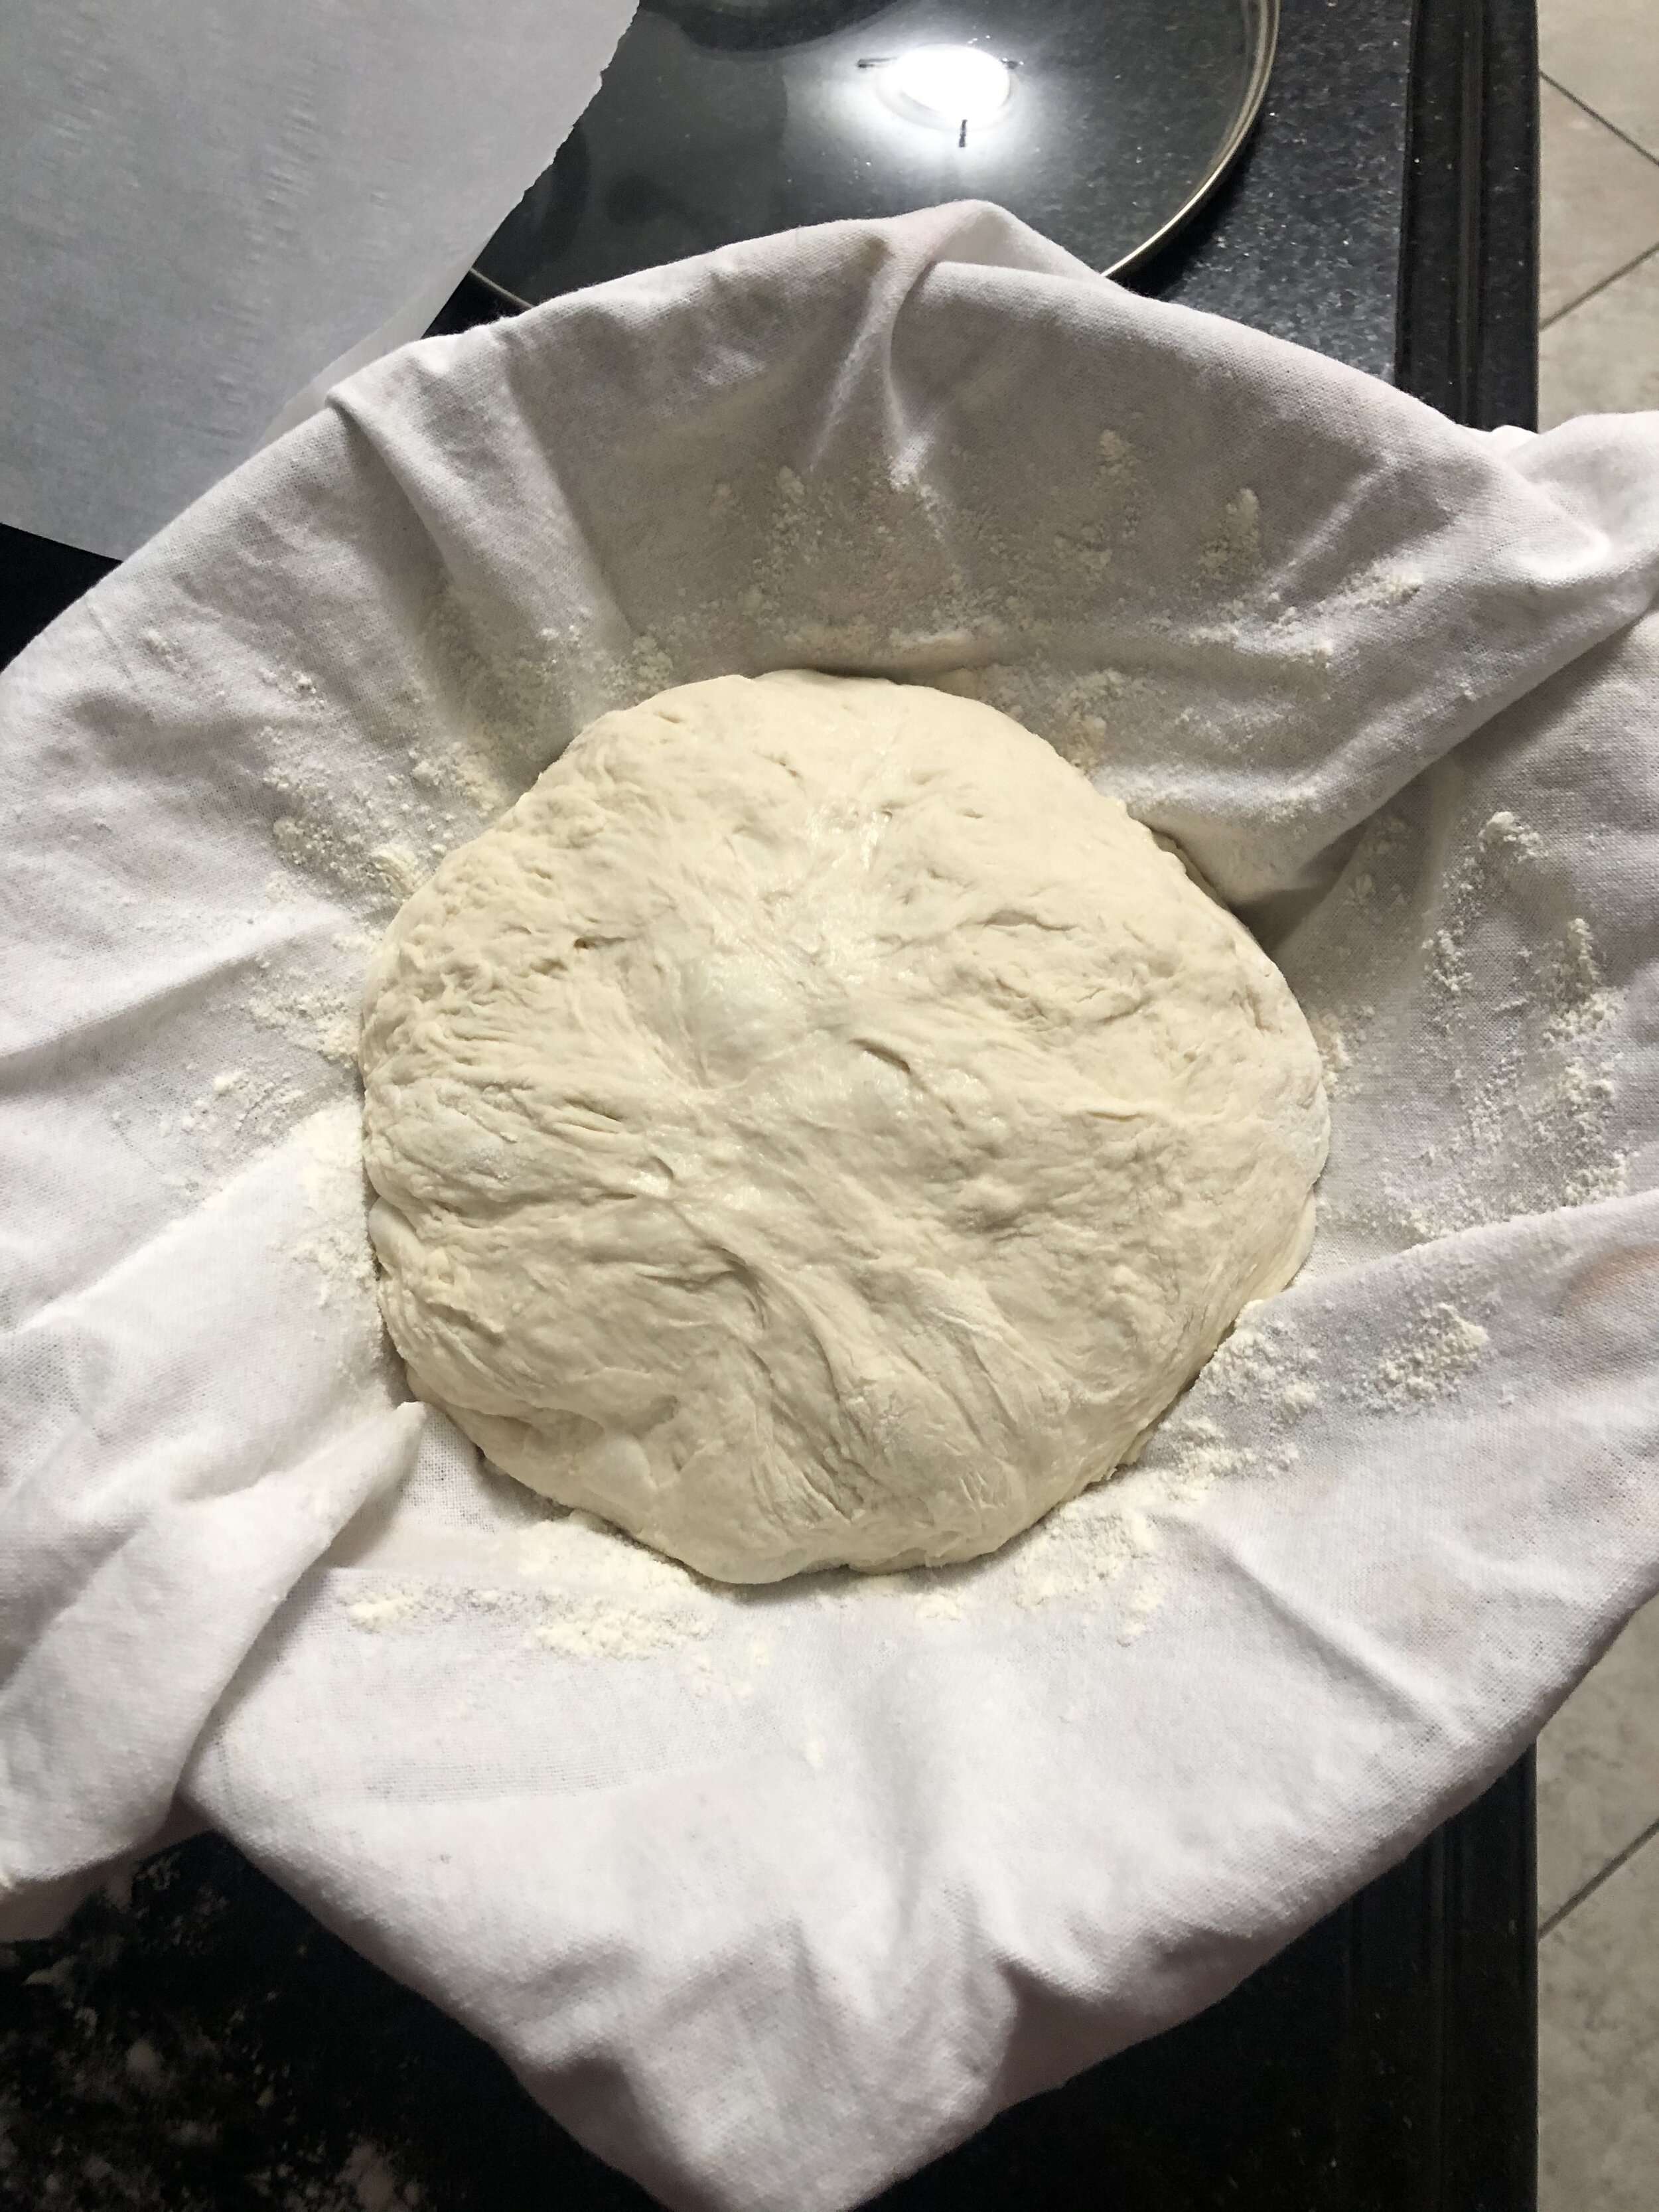
  8. Line a large bowl with a linen towel. (don’t use a towel that produces lint lol)

  9. Dust the bowl & towel with flour. Place the dough with the seam side up.

  10. Cover it and let it rest for 1 hour.

  11. Preheat oven to 450 degrees. Cut a piece of parchment paper to fit your Dutch Oven. Make sure there’s excess so that you can use it like “handles” to take the bread out of the pot.

  12. Place the parchment paper over the bowl and turn the bowl over to allow the dough to fall right onto the paper.

  13. Use a knife and make 4 little cuts. Or if you want to do a fun design, go for it.

  14. Pick up the dough and parchment and place in the pot, carefully.

  15. Place the lid on the pot and put in the oven for 20 minutes.

  16. Remove the lid and bake for another 20-30 minutes. My oven temp is slightly off so I cook for a shorter time. The longer you go, the darker the crust.

  17. When done, remove the bread from the pot and cool on a cooling rack for a minimum of 20 minutes, which is so hard to do! The loaf will feel very hard and if you thump it, it will sound hollow. Don’t worry, after cooling down, it will soften right up.

  18. Slice and enjoy with a little butter!

click on the right side of the images to scroll through the steps to see if you are on track!

I hope you guys enjoy the bread when you make it! If you try other versions, let me know! I also made a Rosemary Olive Oil loaf and will post updates for that recipe soon!

Love,

Aubrey


5 Ways to Make Eating Vegetables More Fun

“I know I should be eating them more often, but I honestly hate eating vegetables.”

That is a sentence I hear almost every single day and definitely at every Farmer’s Market when someone sees our green juice. Thankfully, I am able to convince just about every person to try a juice sample and they end up surprised they like drinking these vegetables. Unfortunately, I can’t always be there to encourage or give samples, etc. I know it can also be a struggle to get your kids to eat them, but if they see you eating them and enjoying them, they might just be willing to follow your lead.

So, let’s talk about a few really easy ways to get more vegetables in your daily diet:

  1. Make it a family challenge. Because who doesn’t love a challenge? Create a chart with each family member's name and earn a point for each vegetable you eat in a day. Offer bonus points for including a variety of vegetables that encompasses each color of the rainbow! Decide what the ultimate prize will be and make it good! For example, maybe the winner won’t have to do chores for a week? That might be quite the incentive.

  2. Incorporate into a juice or smoothie. I include TONS of vegetables in the Real Peel juices, but smoothies are also a really easy way of getting your greens in without having to cook and eat them separately. Most people or kids won’t even bat an eye when they drink a smoothie, especially if it’s a pretty color like purple or green! The rule of thumb for a healthy smoothie that isn’t packed full of sugar is three greens/veggies to one fruit. For example, you can choose spinach, kale, cucumber, and an apple or beet greens, beets, celery, and an orange. There are millions of combos you can come up with.

  3. Grow your own. This is probably the most cost-effective and healthiest way of incorporating more vegetables in your life. You can start small with an herb garden and eventually grow in succession planting throughout the summer and fall. If gardening is new to you, pick out two or three of your favorite vegetables and grow them in a pot or container. If you already love gardening, maybe expand your variety of crops and incorporate new vegetables you normally wouldn’t grow or buy. This could be an incredibly rich experience for children to learn where their food comes from and will be much more delicious and nutritious than any store-bought veggie. For an awesome gardening resource check out The Farmers Almanac (www.almanac.com/gardening)!

  4. Join a CSA or go to a farm. If starting a garden isn’t the right choice for you, then benefit from someone else's green thumb! Finding a local organic farm will give you the opportunity to purchase a crop share or simply shop in their market. Through community supported agriculture (CSA) each week you will have the privilege of eating vibrant, just-harvested produce while simultaneously giving back to your local farmer. If you decide to shop in their market, bringing your entire family could be exceptionally fun if they offer pick-your-own produce! Getting yourself or kids involved will make your experience around vegetables more positive.

  5. Bake a sweet treat. Yes, you can incorporate your vegetables into your baking! Vegetables like squash, pumpkin, sweet potato, zucchini, and beets are the perfect addition to many baked goods. The goal is to find a recipe that includes other whole-food ingredients. Growing up, my mom made us Zucchini Bread and I never bat an eye at the fact there was zucchini in it. I would share that recipe, but it’s a family one, so I will share another one that’s alllllmost as good ;) Check out this zucchini bread recipe from Ambitious Kitchen!

Pick one and give it a go and start reaping the benefits of getting those “hidden” veggies in! Once you get one down, start another!

Until next time,

Keep it Fresh. Keep it Simple. Keep it Real.

xo Aubrey

What is an NTP?

IMG_3362.jpg

What is a Nutritional Therapy Practitioner? What will I be doing?

A friend of mine going through this program with me did a great post about this and it inspired me to inform you guys on what I will be doing as an NTP and what you can expect from me once I am done! (PS. you can check out Lauren on Instagram @backtovibrancy)

First off, if you are new here, Hi, my name is Aubrey and currently I am going through schooling to become a Nutritional Therapy Practitioner. I also am the creator of Real Peel Juice & Nutrition. You can read more about my story, here.

Back to it…

The NTA program develops on a few important foundations, Nutrient-Dense Whole foods, Digestion, Hydration, Blood Sugar Regulation, Dietary Fats and Minerals. Our approach is focused on the individual. The idea of bio-individuality, meaning that each person is biologically unique, guides us away from one size fits all programs. Each person’s body functions differently, so I will dive deeper (explain this more later) to develop a unique diet and lifestyle plan to get their body functioning optimally, as it should be.

We train on 3 levels. The first is like any other schooling. We read, study, do homework assignments, etc. Then, we start on the Functional Evaluation and then end with the Lingual-Neuro Testing. These final two parts are extremely important for us. During these two, we palpate particular points on the body to test for how your body’s organs are working together and guide us on how to develop a plan personalized for you.

Once I finish the program in June, I will have the opportunity to become Board Certified in Holistic Nutrition through the National Association of Nutrition Professionals, which I will definitely take that opportunity. This will allow me to stay up to date on all things nutrition, so that I can always provide you with the most accurate information for your health journey.

What About After?

Alright, that’s all good and well, but what will I do with this new status?

My main focus will be on Digestive issues.

Most of you know that I suffer from Gastroparesis and am on my own healing journey, but there are SO MANY people out there that suffer and the doctors have no answers. Or the answers are just trying every medication on the shelf. So, I will be creating programs to help those suffering, start their own healing journey, and give them hope that there is a light at the end of the tunnel.

Along with Gastroparesis programs, I will be creating programs for just about every kind of digestive issue you can think of. So, if you have reached out to me for help in the last few months, hang on with me for another few and I will be happy to help you.

The big question I get a lot, Will I be working on weight loss for people? It’s not going to be my main focus, but I will definitely be taking client for this. A lot of what we learn in our studies will contribute to weight loss, but just like I have said before, I do not have a magic pill or quick fix and I don’t plan to.

Mostly, my goal will be to help people heal, provide them with the knowledge to do it on their own and give them hope. Hope that they can overcome their illness, hope that knowing they aren’t dealing with it alone and hope to know that there are answers out there for you.

Anyhow, I (hope) this has helped shed a light on what I have been up to lately. Thank you to all of you who have been reaching out to me through private message and asking me how it’s been going, I appreciate your support.

Be ready for Summer 2019, because once I am done, I plan to come out of the gate ready to go!

Until then,

Keep it Fresh. Keep it Simple. Keep it Real.

Love, Aubrey

Veggie & Meat Lasagna

IMG_2616.jpg

Wowowowow. That’s all I can say about this lasagna recipe.

I don’t ever intend this site to be some type of recipe blog, but I do think with nutrition, it’s important to showcase a few wins in the kitchen. This recipe was one of them.

Typical lasagna recipes are full of ground beef and sausage, but with Gastroparesis, that is not something my digestive system can handle a bunch of. However, my husband is definitely a meat and potatoes kind of guy, so we compromise. Most weeks consist of 3 meals with meat and 4 meals without. It seems to be a good balance for us.

This lasagna was a beautiful combination of both. Instead of 2 lbs of meat, I threw in 1 pound and then substituted with zucchini and squash triangles. It added that perfect meatiness to it.

Give it a try and let me know what you thought about it.

IMG_2617.jpg

Ingredients:

1 lb 100% grass-fed ground beef

1 tbsp olive oil (can sub avocado oil)

1/2 onion diced

1 tbsp garlic

1 zucchini chopped into small cubes

1 yellow squash chopped into small cubes

2 14oz cans of diced tomatoes (can also chop 4 tomatoes and add water)

1 6oz can of tomato paste

Salt & pepper

2 tbsp parsley

2 tbsp basil

1 15oz tub of ricotta cheese (can sub cottage cheese, goat cheese or silken tofu)

1 egg

1/2 cup parmesan

Mozzarella to top

Directions:

Preheat oven to 375. Boil a pot of water and cook the noodles as directed on the package. Drain and lay out on foil to dry and cool down.

While the noodles are cooking, diced the onion, and cube the zucchini and squash. Heat the oil in a pan, add onion and garlic and cook until translucent. Add the beef, zucchini, squash and salt and pepper. Cook until beef is browned. Add in diced tomatoes, tomato paste, 1 tbsp parsley and 1 tbsp basil and more salt and pepper to taste, as needed. Bring to slight boil and then lower heat to simmer for about 35 minutes. Stirring occasionally.

Combine ricotta cheese, egg, Parmesan, the remaining parsley and basil and salt and pepper.

Spoon in sauce mixture into a 9x13 casserole dish to cover the bottom. Evenly spoon ricotta mixture onto each noodle sheet. (about 1 tbsp per noodle) Then, drizzle the meat sauce on each noodle sheet. Roll up each noodle and place in dish sideways. You should be able to get 5-6 lasagna rolls per row for 3 rows. Top the rolls with the remaining meat sauce and then add mozzarella to cover.

Bake in the oven for 20 minutes. If you like that browned cheese flavor, broil for 3 minutes.

Serve with garlic butter broccoli and ENJOY!

If you make this, let me know in the comments your thoughts or send me pics of it! We LOVED it. It also made enough for 3 meals for both of us! So, 6-8 servings.

Xo Aubrey